Showing posts with label Retro Sketches. Show all posts

Tuesday, September 24, 2013

Merry Christmas

In addition to embossing, I am also addicted to window cards recently.  I've made two for two kiddos that are turning one later this year, and I am sharing a Christmas card with a window today:


This card is probably one of those that gives me the hardest time to capture the details.  I have tried different angles, tilting the card using different objects, using my hand to hold it, etc.  Boy, the time I spent on taking a picture of it was probably just as much as making the card itself.

The picture shown is a compromise among various things.  I hope you can see the window, which is a tree, and through the window it is a coordinating stamp.  Do you see some sparkling things on the right of the card?  It says "Merry Christmas" and was embossed with Ranger Polysparkle Embossing Powder.  It is the culprit that made the card difficult to picture.  When you lay the card flat, the embossed sentiment looks like clear embossing powder, but if you tip it to the light or bring it closer to your eyes, you see a little rainbow effect.  It is very subtle but nonetheless makes it more interesting.

One thing I like about this card is the lower green panel.  It is Pear cardstock stamped with a background stamp in Olive.  I like tone-on-tone but this one where the stamped image is one step deeper than the cardstock is just equally lovely, and it matches with the red panel where the polka dots are a tone lighter than the background.  Nice, huh?

My card is entering the following challenges:
Christmas Stampin All Year Long - Christmas Cheer, Anything Goes
CHNC Challenge - Stamp, Stamp, Stamp
Paper Creators Craft - Make it Christmassy
Totally Gorjuss - Dotty
Retro Sketches


52 {Christmas} Card Throwdown - Christmas Tree


Thanks for stopping by!

Thursday, June 27, 2013

Another birdie

Today I'm sharing a card using another birdie image from the same stamp set I used yesterday.  Here you go:


Totally in love with the image.  Elegant and versatile.  I got the sketch from Retro Sketches:


See how I use color pencils to outline the image?  It was a lot of fun and I like that it adds some colors subtly to the image.

Thanks for stopping by!
Pin It

Wednesday, February 20, 2013

A sympathy card

A quick post here to share a sympathy card.  It is not my favorite kind of card to make but for some reason it is often the kind of card that you think you have it in your stash but you don't.

The sketch of the card is based on the one at Retro Sketches:


and I was also inspired by the colors at Inspired By.  So I've used Gray and Buttercup cardstock and inkpads to make this card:


The flowers are very light in color because I've used second generation stamping, while the sentiment was stamped in full strength of ink.

Thanks for stopping by!

Wednesday, February 13, 2013

One more Chantilly birthday card

I have been having a lot of fun with the Chantilly paper packet and hope you have not been bored by this series of birthday cards.

Today I'm using the sketch from Retro Sketches to make a birthday card:


My card made use of the stamp from Chantilly cardmaking workshop on the go:


Making this card is a lot of fun.  First is that I have an opportunity to color the cake.  Coloring is therapeutic!  Then I had fun "coloring" the frosting with the Stardust Glitz Glitter Gel.  The picture is not doing its justice but in real life the frosting is glittering!  Finally, I realize that I could easily transform this into a manly card.  In fact when I first started I thought about that, that's why I've used Twilight to be the liner for the cake.  I've eventually used Creme Brulee for the banner to neutralize it to become a girly card.  Had I chosen a darker color, it would become a masculine card.  I like that it could be used both ways!

Thanks for stopping by!

Monday, February 4, 2013

Happy Birthday

I love the Gradient Technique so much that I have to make another card!

I'm using the sketch from Retro Sketches:


This time I'm using another color combo: Pear, Lagoon and Twilight.  I think it is a good one for masculine card:


The background is just Lagoon cardstock with random stamping of stars from Live Life.  The banner is Pear cardstock stamped with Versamark and heat set with White embossing powder.

This technique gives me so much fun and I can't stop playing with it!

Thanks for stopping by!

Thursday, January 10, 2013

Elements tied together

I love background stamps because there is so much we could do with them.  Let me share a card where I tied all pieces together by a background stamp.  All the pieces were stamped with the same background stamp:  the grey tag and the red heart were stamped tone-on-tone, the black banner was stamped in Versamark and the image was then embossed with clear embossing powder.  Finally, the little white banner was stamped in the third generation hollyhock.  That gives a sense of unity and that's what I like about this card:


Needless to say, I also like the sketch provided by Retro Sketches and the color combo challenge presented by Pals Paper Arts:


Thanks for stopping by!


Sunday, December 23, 2012

An early "Happy New Year!"

It's not yet Christmas but why would I wanna say "Happy New Year!"?

A friend got an unexpected gift this past Friday and asked me to make a New Year card.  "Sure," I said but then realize I had to dig through my stash to get the supplies!  The time I spent on looking for this old stamp set was more than the actual time I spent on making the card!

It's worth it.  I like the card and nothing makes me happier than giving some love to those "abandoned" stmaps.

It is a simple card based solely on stamping:


This card is entering the challenge at Unscripted Sketches.  You'll see that I've follwed the sketch very strictly:


It is also entering the challenge at "Less is More", whose theme is "Drinks."

Check out what other crafters have created and be inspired!

Thanks for stopping by!
Tuesday, December 18, 2012

Let it snow!

I'm in the Let it snow mood!  You've seen my one layer snowflake card from yesterday and today I'm sharing a card featuring more snowflakes!


The focal point is actually made up of two snowflakes of different shapes, and the middle panel is random stamping featuring small snowflakes!

The card is entering the challenge at The Paper Players, which asks us to make a CAS project featuring snowflakes:


It is also entering the challenge at Retro Sketches:


Please click the links to the challenge posts to see how others have prepared for the challenges.  Let it snow, let's be inspired and creative!

Wednesday, October 3, 2012

More Christmas

Let's continue our journey to Christmas with a Christmas card today!

I'm using my old friend, Stella paper packet to make this card.  Stella was first introduced in the Spring/Summer 2012 idea book and is carried over to the current idea book.  I love the vivid, bright and bold colors of it and it is a truly versatile paper packet.  You think the colors are girly?  I think they can be Christmas-y.  You'll see what I mean when you scroll down to see my card.

Before I show you the card, let me tell you my inspiration source:  a sketch by Retro Sketches:


And here's my Christmas card made of Stella paper packet:


Want to know my secret to stamp the greeting solid enough on a patterned paper?  It is double stamping.  Like its name suggests, double stamping is simply stamping twice on exactly the image was first stamped.  It is a useful technique when it comes to stamping on patterned paper, or when you want to make something pop out more than the rest. 

If you are using traditional rubber stamp, you'll likely need to use a stamp positioning tool to help you double stamp.  Thanks to the clear stamps I have from Close to My Heart, I could see through the stamps and stamp it on exactly where I want - zero guess work!

This card is also entering the challenge at Created with Love, asking us to make something Christmas-y!

Try it out on your artwork and you'll like this technique!  Thanks for stopping by!

Thursday, September 13, 2012

Let's Hang Out

Continuing my mix and match from yesterday, I'm using the Lucy paper with the new stamp set Pun Fun. 


I'm entering this card for the challenge hosted by Red Carpet Studio, where this week's challenge is a Pun Card challenge.

 and the challenge hosted by Retro Sketches.  It's sketch looks like this:


Thanks for stopping by and be sure to check out what other bloggers have come up with for the challenges!

Thursday, September 6, 2012

Halloween card for a cute kid

I need to make some Halloween cards for some darling kids.  They are all very little so I wanted to use bright colors for them.  Crazy 4 Challenges is challenging us to use a color combo that screams halloween to me:


Then I rotated the sketch from Retro Sketches:


to make my Halloween card:


One of the kids likes purple.  I think this card will go to her.  She is, in fact, the cutest.

Thanks for stopping by!

Tuesday, August 28, 2012

Multiple Choice Questions

Remember you were told that when you are down to two answers to a multiple choice question, pick one and don't second guess yourself?

This probably applies to crafting too!

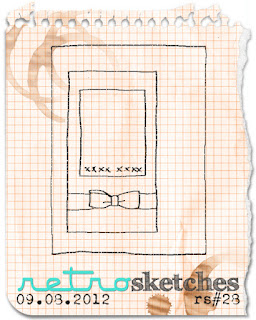
I wanted to create a card using La Belle Vie with the sketch provided by Retro Sketches:


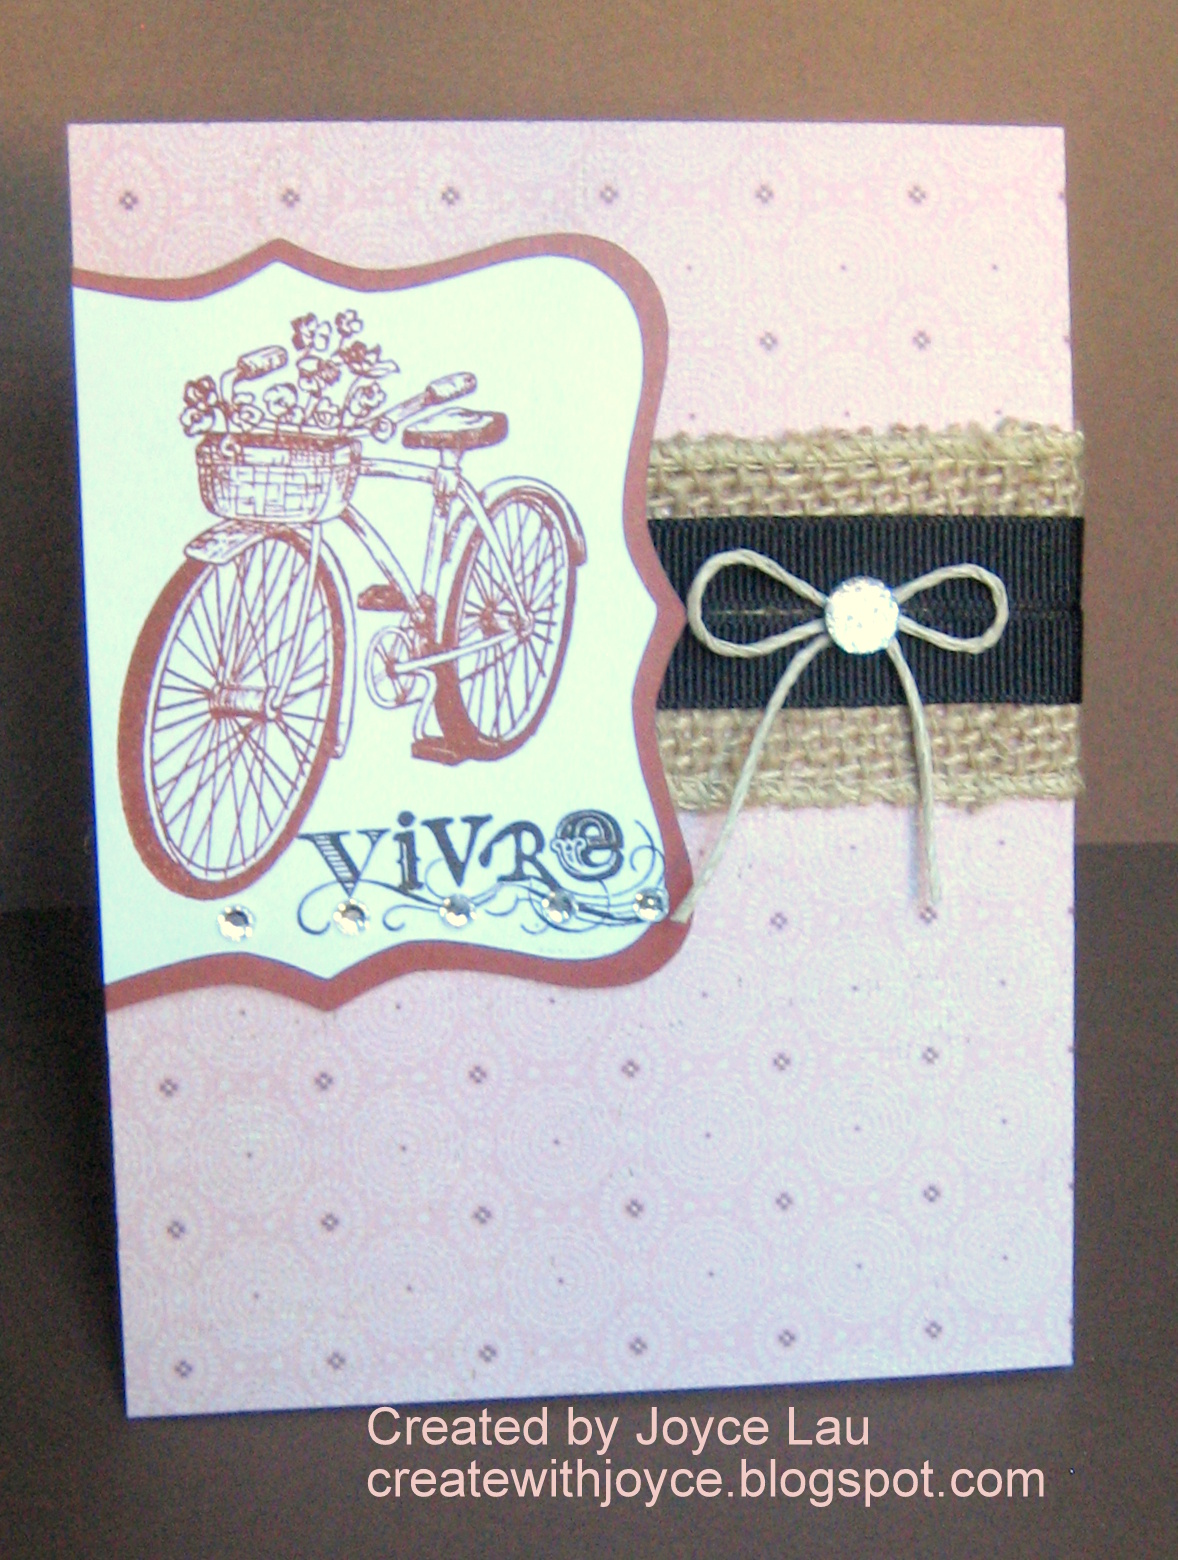
I knew which shape I wanted to cut using the Close to My Heart Art Philosophy cartridge, but could not decide the size, nor could I decide which stamp to use.  I have come up with at least four versions.  Eventually, after looking at the first one that I made, I thought that was the best one.  How funny is that?  So here's my first and last version of the card:


La Belle Vie paper packet is the one that I "love at first sight."  It is elegant and romantic.  Have you heard about the advantages of the Close to My Heart Burlap ribbon?  I thought others were exaggerating but it is definitely amazing - no smell, no weird touching, easy to cut and no trimmings, etc.  You see the plain use of it here, but in my other abandoned verions, I've done different things and it is so easy to work with.  No mess!  I highly recommend it!

Materials used:
1.  La Belle Vie Workshop on the Go
2.  Cricut Art Philosophy cartridge
3.  Bonjour stamp set
4.  Bard Red cardstock
5.  Hemp (natural)
6.  Bulk Ribbon (burlap ribbon)
7.  Sparkles - clear assortment
8.  Black grosgrain ribbon (retired)


Wednesday, August 22, 2012

For You

I saw this challenge called Color My Heart Color Dare Challenge which was administered by fellow Close to My Heart consultants and focusing on the Close to My Heart palette.  This week it is challenging us to use Hollyhock, Blush and Olive.

I just happened to have a scrap piece of hollyhock and thought why don't I try using the color on a sketch?

I'm using the sketch presented by Retro Sketches:


My card follows the sketch pretty strictly:


I used some scraps and the stamp set from Lucy Workshop on the Go, and finished the card with the Hollyhock ribbon that has been sitting alone sadly in my stash.  I like that Hollyhock is a shade darker than Blush so I could use it to outline the flowers that are stamped in Blush.  How nice!


Tuesday, August 14, 2012

Gratitude

I need to make a clean and simple card for a card swap.  The theme of the swap is fall, so I've set my mind on using the Flirty paper.  However I wasn't sure how to use my products when it has two colors that are exclusive to the paper but not available in the Close to My Heart palette.

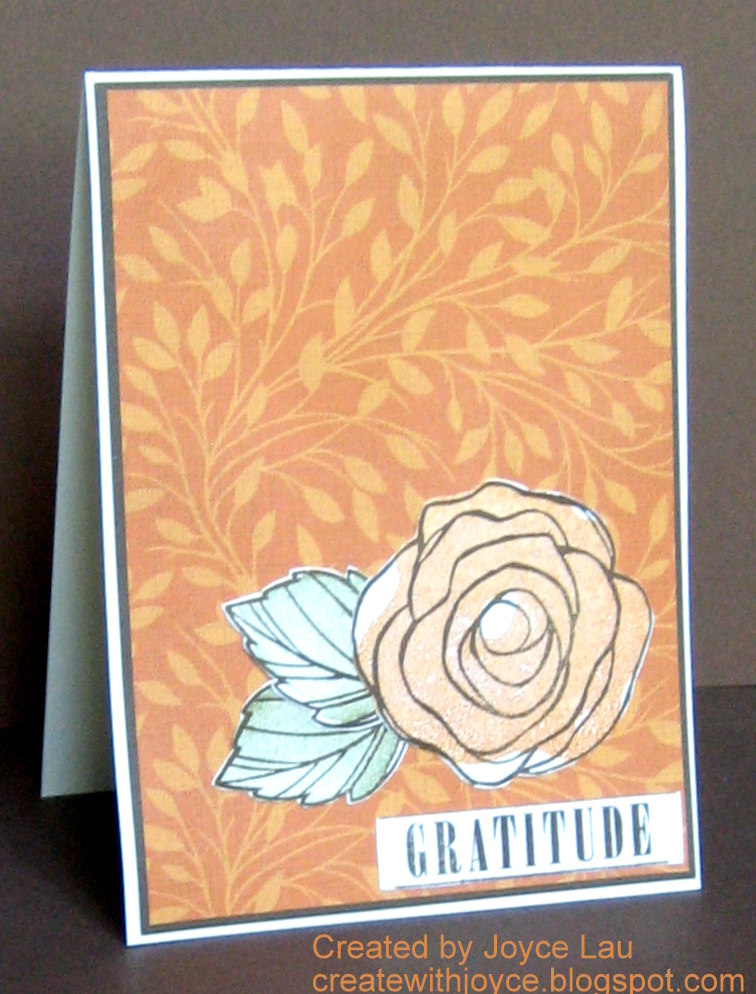
I was a little worried but after some experiments, I figured an easy way to cope with that:  second generation stamping using the back side of the stamp with Autumn Terrocota!

The sketch for my card came from Retro Sketches:


It was totally a stretch of the sketch, I am hoping the petals of the flower constitute the circles:


Something interesting about this stamp set is that the solid stamps are treated so that it does not take as much ink as other stamps.  I saw that there are tiny grooves that reduce the area that could take up ink.  Had I chosen to stamp using that face, the color is even paler than my second generation stamping.

Thursday, July 5, 2012

A quick card

Oops.  I had so much fun celebrating July 4 and almost forgot to prepare my blog post.  I am so glad that I saw the sketch from Retro Sketches Challenge because I could immediately visualize the card I wanted to make.  The sketch looks like this:


Doesn't this sketch give you lots of ideas?  The card that came to my head immediately after I've seen this sketch was put together quickly:


Materials used:
1.  Stella paper packet
2.  Creme Brulee cardstock
3.  Sparkles - clear
4.  Paradise Paper Flowers
5.  Baker's Twine - Paradise Assortment
6.  Card Chatter - Birthday stamp set
7.  Cocoa Exclusive Inks Stamp Pad


Thursday, June 14, 2012

Today is a present

I came across this sketch from Retro Skethces and I just can't stop thinking about creating a card using the Florentine paper packet.

This is the sketch that Retro Sketches presents:


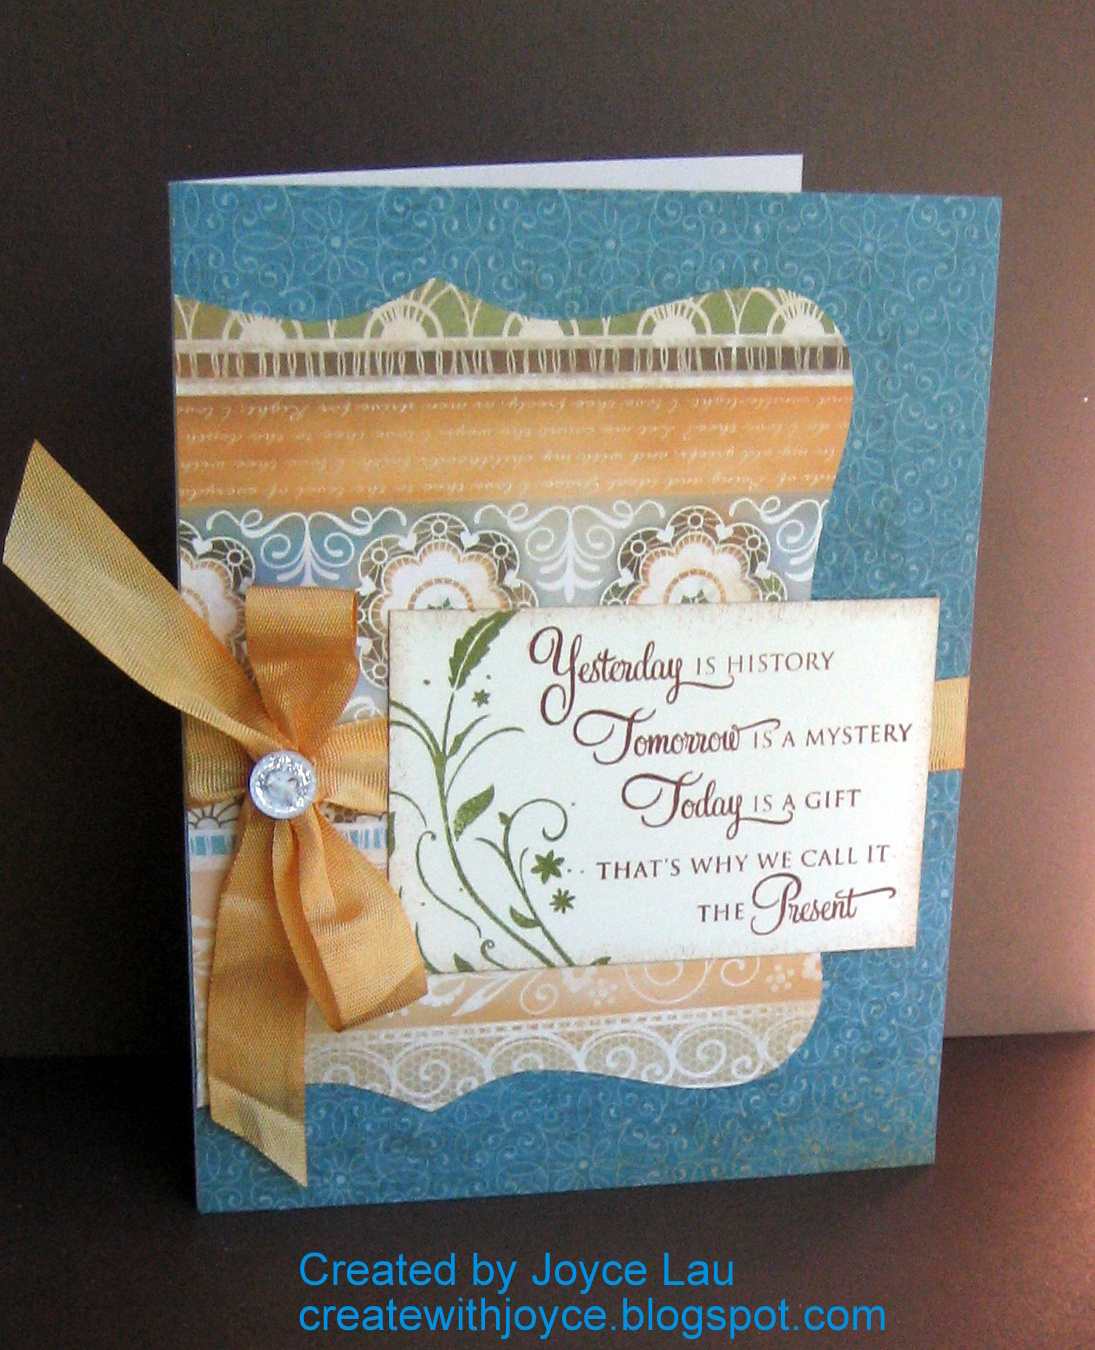
My card looks like this:


The stamps come from the set called "The Present" and I really like what it says.  So encouraging! 

Materials used:
1.  Florentine paper packet
2.  The Present stamp set
3.  Color-Ready seam binding ribbon
4.  Bohemian assortment
5.  Barn Red Exclusive Inks Stamp Pad
6.  Olive Exclusive Inks Stamp Pad
7.  Creme Brulee reinker

Monday, June 4, 2012

Simple card on a busy Monday

What is helpful when you are busy with other things but you want to have your creating fix?  A simple card.

I've adopted the sketch from Retro Sketches:


This is my first time to participate in their challenge and I've used the elegant Florentine Workshop on the Go:


Workshops on the Go are always my friendly helper.  It has everything you need to create pages or cards and everything in the packet coordinates with each other!

To make this card I simple cut out a strip from the paper, then stamp the flower three times in three different colors.  Cut them out, use 3-D foam to layer them to create more dimension.  Finally I stamped the sentiment "A note for you" from the Just for You stamp set.  As simple as that.  Love it.

Materials used:
1.  Florentine Workshop on the Go
2.  Just for You stamp set
3.  Goldrush Exclusive Inks Stamp Pad
4.  Garden Green Exclusive Inks Stamp Pad
5.  Twilight Exclusive Inks Stamp Pad