Showing posts with label Cricut Art Philosophy Collection. Show all posts

Wednesday, September 14, 2016

Lake Louise

During last month's family reunion, we went to Banff and other places.  We loved the scenic beauty!  The weather was not always the best but we kept on taking pictures regardless.  The views were just breathtaking!

I'm sharing one picture taken by my phone while we were at Lake Louise.  It was cloudy when we arrived. Because of that, we thought we would take pictures after our hike.  Guess what?  After the hike up to tea house, it poured.


I'm using the sketch at Let's Get Sketchy:


The beauty of the lake is best documented using a simple layout.  I'd like the picture to be the focus because I just wanted to capture its beauty.  It doesn't need a busy layout or many embellishments.  The picture itself should pop.  A picture is worth a thousand words.  Even my journaling is kept to a minimal.

Thanks for stopping by!

Monday, April 25, 2016

Dinner at Ikko

Last July, I had the opportunity to enjoy a nice Japanese dinner at a restaurant called Ikko.  I took many pictures of the food, despite the dark interior of the restaurant.

I have finally developed the pictures to create a scrapbook page:


I had to make two layouts - one for the food and one for the gluttons.  This one is dedicated to the food.  Sorry about the glare.  I wish I knew how to take better pictures without background lighting.  Note to self:  try taking pictures during daytime instead.  LOL.

I'm entering the challenge at Heart 2 Heart.  The theme is Photo Op.  For me, I'd love to capture all those little moments in life - those with family and friends are the precious ones, even if we are not doing anything special.  Years later, these photos/layouts will help us remember what happened.  I've specifically added two camera motives onto this layout.

Those cameras come from Life in Pictures, this month's Stamp of the Month.  There are only a few days left to get this cute stamp set.   Camera images can be used for cards and layouts. I've made a card here.  It was just one image but with different colors, the camera image makes me smile.

Thanks for stopping by and have a great week!

Monday, March 28, 2016

So Lovely

Sale PSA: Close to My Heart's Stampaganza (Buy Two Get One Free) campaign is ending this Thursday, the end of this Month.  Even though I am the one who said I do not want to buy just because of a sale, I just put in an order with stamps and stamps only.  This is a rare opportunity so take advantage of it.


Close to My Heart used to continue the production of all Cricut compatible stamps indefinitely.  But it is changing its policy.  Stamp sets will only be available during the life of the idea book where the stamps appear, even if it is a Cricut cartridge compatible stamp set.  Further, all stamp sets in the current Seasonal Expressions will retire by end of April 2016.  Some items, such as the thin cuts for this popular stamp set Springtime Wishes, were already sold out.  So if you have been holding off, don't wait any longer as the hot items could be gone anytime soon.

A special stamp set Hello Paradise is only available until the end of this month.  It is a cute stamp set with solid images that can be used for a variety of occasions.  Close to My Heart has designed a few layouts with the use of this set.  If you want to have a copy of it please contact me.

Today I'm sharing a layout.  In particular, I'm taking this as an opportunity to answer a question I have received: how do you use certain themed paper for a completely differently themed layout?  My simple answer is just go for it, have fun and adapt it to your need.

Some people think and feel that the Charlotte paper is wedding/romance themed.  I do not disagree that some elements do remind us of love, wedding, bliss, etc. but look beyond those elements.  What about the color scheme?  What about the patterns?  I have made numerous pages using this paper pack but none of them is wedding/love themed.  For the one I'm sharing today, I used it on a layout for pictures I took at the awards banquet in last year's Convention:


See the 4x6 black cut- apart card on the right?  It says "Home is wherever I'm with you."  But I've covered up the text with another cut-apart card that only has arrows on it.  They make quite a good match because the 4x6 black card also has some arrows.  Another cut-apart card is full of lovely flowers, which can be used for all occasions anyway.  I then grounded these elements with the label strip which has stripes only.  Had I not told you about it, who would know that it was designed for weddings?  These patterns are so versatile, and it will be a waste if we limit it to the use for weddings!

Next time if you turn down a paper collection because you do not like its theme, look beyond that and see if there are other elements that you like - motif, colors, patterns.

I'm entering my layout to the challenge at The Paper Girls - Paper Girls.  What's better to capture an exciting moment where the crafty girls were taking pictures at the beginning of the banquet?

Thanks for stopping by!

Monday, September 28, 2015

One Amazing Day

Last December one of the destinations of our family trip was Antelope Canyon.  It was a place where even our GPS and navigation system had a difficult time to locate.  It was winter time and early in the morning when the sun was still behind the clouds.  Cold.  Windy.  Lost.

We wanted to go there because we learned that a landscape photographer sold  a photo taken there at $6.5 million!  See the info about this most expensive photo here.

Because it was too early, we didn't get enough sunlight to take good pictures of the passageway of the Canyon.  Further, my hands were freezing (even with gloves) and shaking.  I couldn't take any decent pictures. We had a hard time capturing the rocks, let alone our faces.   When we came out of the passageway, however, the change of lighting and temperature made a world of difference (before the tour, we were told that it was at least 10 degrees lower inside the passageway).  We started taking more pictures because our faces became "visible" again.  This is one that my mom and I took right outside the passageway.  The light was not good (the further we walked away from it the brighter it was) but we couldn't wait to capture it:


I used the Zoe paper pack to make this layout because the Sorbet color matches so well with the rocks of the Canyon. I've also used several images from The Authentic Life stamp set to create a journaling box and accents for my layout.  Of course the Zoe Complements is a must, even though I've only used one piece of the die-cuts. 

I first worried that a 4x6 picture on a 12x12 layout might get lost and the layout would have too much emptiness.  But I think the colors and patterns of the Zoe paper pack have totally eased my concern.  The layers and patterns balance with the picture nicely.  

One side note:  you see in the picture that I was holding a blanket.  No, that wasn't for me even though I am perpetually cold.  We had the blanket ready for my two-year old niece.  Towards the end of the tour she woke up from her nap and started walking on her own and didn't want the blanket anymore.  

I'm entering this layout to the challenge at Heart 2 Heart Challenges: Change.  It's the change of lighting and temperature that prompted us to take this picture and document this story on a layout.  "Change" can be broadly defined, go see other inspiring work by the talented Heart 2 Heart design team!

Monday, September 7, 2015

Sending You Happy Thoughts

Happy Monday everyone!  Hope my US friends are enjoying their long weekend.  I sure do enjoy this extra day that gives me extra time to play at my craft desk. :)

It has been ages since I played along any challenges.  Since it is Monday, I'm playing with Mojo Monday Challenge.  I have already made many layouts with the Close to My Heart Zoe paper, but I still have quite a bit of scraps left.  The scraps, together with the new For Family stamp set, are just perfect to create this card:


I've followed the sketch carefully:


I'm also entering my card to the following:
All sorts challenge - lots of layers
Crafting from the Heart - Anything Goes
Craft Your Passion - Anything Goes
Simon Says Stamp - Stamp and Punch/Die Cut

I'll be sharing the layouts later.  Stay tuned!

Thanks for stopping by!

Sunday, August 30, 2015

Blossom Mini Album

I've promised that I will share the album I made with the retiring Blossom Paper and which was shared at the Close to My Heart Convention in July.

Thanks for your patience!  I am finally ready to share the highlights of the album.

Caveat:  Even though I'm only showing the highlights, it's a lengthy post that's picture-heavy!

Let's start with the cover:


I want to mention that I love the mini-album pages created by the Close to My Heart Artbooking cartridge and there are many pages in this album that were made using that cartridge (very few of them are included in this post though).  For me, however, I always prefer a sturdy cover for my albums and thus I've inserted my pages inside the Kraft 3-Ring Album.  I do not embellish the cover that much because I don't want the decorations to be crushed.  As seen in my album, I just have a sticker and a few rolled flowers from Close to My Heart Art Philosophy cartridge.  If I were not going to use this album, it would probably be very different.  But most of the albums I made will become gifts for family and friends, and I want them to be able to use them, thus functionality and purpose were always on my mind when I was making my albums.  Another advantage of the Kraft 3-Ring Album is that the user can re-arrange the pages as they please, which give them a lot of flexibility compared to a bound album.

Another note is that I love 4x6 prints.  I honestly do not have the time to sort photos then choose what size for which photo.  I normally upload hundreds of pictures and select 4x6 for all of them.  Again, I love those 3x8 pages made by the Artbooking cartridge but I don't see myself using them for holding photos.  I would normally use them for journaling.  Speaking of which, I am really itching to buy a photo printer.  If you have any recommendations, please let me know! :)

Now that you know why I prefer using the Kraft 3-Ring Album, let's look at some of the cute pages. Let's start with this one with a pocket and an accordion album:


The size of this page is 6x6.  I used a Memory Protectors Flip Flips 6x6 as the sleeve.  To make the spine sturdier, I stuck a half inch cardstock to the closure of the flip flap.  In fact, the cardstock also makes it easier to punch the holes to fit the album.  I decorated with two tags cut with the Art Philosophy cartridge (p.41 and p. 29) which were tied to the page by some Glacier extra thick twine and see the Smoothie flowers at the bottom?  They are negatives of a PML card cut from the Artfully Sent cartridge (p.31).  Oh the Sunset flowers on the cover of the accordion are the negatives from another PML card as shown on p. 17.  Let's just say I'm good at recycling, or better yet, upcycling. :)

Another favorite page of mine involves many "hidden pages".  The front looks like this:


The Glacier top is decorated with the Carnival Washi Tape pack and stamp images from the Blossom Workshop on the Go kit (sadly, it is out of order).  I've added a paper clip cut by Artfully Sent cartridge (p.45) and I've stamped a tiny floral image from Finding the Words on it.  And yes you can use the little clip to open the top page:


Then you'll see this when you turn this page over:


Again it is decorated with the Carnival Washi Tape Pack and I've stamped "DOCUMENTED" from Instalife stamp set.  This flap can be opened too:


The circles were stamped with the same tiny floral image from Finding the Words.  I have an overlay of circles from Artbooking (p.40) so I have to up-cycle the circle cut outs.  The page is tied to the page protector using a piece of Slate Diagonal Striped Ribbon.

An album isn't complete without tags, don't you agree?  This page is smaller that keeps two tag:


And the back of it:


I have been asked many times whether I have used the fuse tool to create the page protectors.  The answer is no.  Instead, just like everything else in this album, I either recycle or up-cycle the materials  For most pages, I started with one of the regular page protectors (except for some I started with a flip flap), cut it at 8" (because the album is that long) and I would use the rest of it for another page.  For example in this particular page, I have used Memory Protectors Design 5.  If you look at it closely, you'll recognize that this page is the left most column of the Memory Protectors Design 5.  But the top 4" were cut and I've turned it horizontally (counter-clockwise 90 degrees) and punched holes on the left to fit in the album.

Both tags are cut with the Art Philsophy cartridge (Smoothie tag on p. 70, Kraft tag on p.60).  The glacier butterflies on the Smoothie tag were also cut with the Art Philosophy cartridge (p.55) and the journaling lines came from Documenting Moments stamp set.  The back of the Kraft tag was decorated with some (leftover) Sweet Leaf cardstock punched with the Scallop Border Punch.  The front of it was filled with circles of various sizes.  I've also added pinked circles from Art Philosophy (p.61) and a circle stamped "Way Cute" from True to Life stamp set.

Now, how about a three dimension page?


The Smoothie page on the left was cut from p.48 of the Artbooking cartridge.  The bottom of the right page is a PML card cut from the Artfully Sent cartridge (p.19).  The Sweet Leaf on top is decorated with the cutout from another Artfully Sent PML card (p.11).  The label is an image from True to Life stamp set cut by Art Philosophy cartridge (p.25).  

Be patient.  The three dimensional portion is here:


The tag on the left was a Art Philosophy cut on p.48.  Simply shrink the card to become a tag, how fun is that?  So cute!  The three dimension part was made purely from cardstock and Blossom paper.  No Cricut cut was involved.  I have two 4"x8" pieces of Sweet Leaf cardstock folded in half, then put them in an "L" shape, stuck them together to create this flap.  

Let's take a look at another page with lots of flaps.  The front looks like this:


This page was made using the Memory Protectors Flip Flips 6x6.  I added a strip of Sunset cardstock punched with the Scallop Border Punch.  You could turn the page over with the Pear arrow (an image from Have a Happy Day).  


Inside this page, you'll see the sunset page stamped repeatedly with Botanical Backgrounds.  The label was a Artist cutout (p.66) stamped with the word "Love" from Finding the Words stamp set and you know you can turn this flap over, right? 


That's when another PML card from Artfully Sent (p.17) is fully exposed.  

The last page I'm sharing here is truly a favorite of mine.  It is fully of goodies:


This page made use of the Memory Protectors Design 5 again.  Did you see the top left one is titled "A Book"?  It is a mini book:


It was very easy to make.  Simple fold two sheets of cardstock in half, punch holes in the spine then thread the Glacier extra thick twine to tie them up.  

The top right journaling card is made with cardstock only, where a Art Philosophy tag (p.55) was used, matted with Smoothie cardstock.  The bottom part in Sunset was again stamped with Botanical Backgrounds.  

The tag on the bottom left is another favorite of mine.  I simple added the zip strip to the side, then added a few circles and a pinked circle stamped with images from the Blossom Workshop on the Go Kit, then top it off with a banner stamped with "Smile" from Documenting Moments stamp set.  The PML card on the bottom right was cut from Artfully Sent (p.32).

So these are the special pages in the album.  It was a lot of fun to create it and I'm sure I'll be making more and more albums.  They are great gifts for those who rarely craft but want one for a special event like graduation, wedding, etc.

Remember there are many other "rather ordinary" pages in my album, with the help of the Artbooking cartridge, Memory Protectors and different types of flip flaps.  I encourage you to use these tools to explore your creativity!  The possibilities are endless!  Further, even if you don't have "everything" it will still be fun to challenge yourself to be resourceful to complete a project.  I didn't have the fuse tool, for instance, but various types of Memory Protectors did the job just fine.  To tell you the truth, my Sweet Leaf ink pad was extremely dry, so I used Pear ink pad instead.  It's a shade darker than I wanted, but did you notice that?  Alright if you do please do not tell my recipient of this album, okay?

I had "functional" and "purpose" in mind when I created my album.  If you'd like full-blown embellishment, go for it!  Have fun and create whatever that makes your heart sing!

This is indeed a very lengthy post. Thanks for reading along.  Happy Crafting!


Wednesday, February 25, 2015

Thanks

Building stamps are very popular right now.  I love them too!  I like that they are versatile.  By changing the combination of stamps and colors you have an unlimited number of images!  The February Stamp of the Month at Close to My Heart is a building stamp and I am having quite a lot of fun with it!  I tried different color combinations and stamped an entire background:


I've used the newer colors from the Close to My Heart palette - Pixie, Canary and Glacier.  I was very happy with my one-of-a-kind patterned paper but I'll tell you honestly I was stuck after that because I couldn't decide how i wanted to put it on a card.  LOL.

I knew I should use a big portion of it because the size of the pattern is rather large.  Then I decided to cut 1/2" strip off, attached it to Whisper (grey) cardstock as the card front.  I added butterflies from Art Philosophy cartridge and the sentiment from Artiste cartridge to finish it off.

My card is entering the following:
Party Time Tuesdays - Anything Goes
Cuttin and Stampin - Anything Goes
Through the Craft Room Door - Anything Goes
Retarte - Something New Something Old
Tuesday Throwdown - Anything Goes

Thanks for stopping by!

Wednesday, April 30, 2014

12 tags of 2014 - April

I can't believe that we are finishing one-third of 2014!  Isn't time flying by too fast?

I have meant to play along the 12 tags of 2014 - April as I bought three framework dies in March but it wasn't until this past weekend I just broke the framework dies open.

I made my first card using the courtyard die here and I like it a lot.  Making my own background using these dies is something new and fun to me.  In this card I've only used the pieces and the frame is still sitting on my messy desk.  What should I do with it?  For the April tag of course!


For this tag I want to feel Spring so I've used Shaded Lilac paint for the courtyard die and the Shaded Lilac stain for the ribbon trim.  It was a very thin layer of Shaded Lilac paint and after I have misted it with water I can still see the tissue tape beneath quite well.  I ran the die again on some patterned papers for the pieces but I am afraid many of them are covered by the leaves and the flowers.

By now we all know my go-to-colors for leaves but guess what?  I have changed a bit this time.  Instead of my usual combo of peacock feathers, peeled paint, mowed lawn I am using peeled paint and crushed olive. This new combo does not have the blue hues and I like it just as much. :)

To match with the patterned paper I have cut some yellow and red flowers.  I think they have a nice contrast with the Shaded Lilac background and trim.

It is quite a relief as I almost miss the fun of 12 tags of 2014 - April.  That's why the tag "Breathe" is a good reminder for myself.

Thanks for stopping by!

Sunday, April 20, 2014

Hello

Happy Easter everyone!  I hope everyone is enjoying this special day with love, laughter, joy and yummy food.

I am sharing a quick post today so I could go back to my beloved chocolate -


I used Close to My Heart Cricut Art Philosophy to create this window card and I love love love window card! The card sketch is based on the one from Atlantic Hearts Sketch Challenge:

Internet connection at home has been interrupted, I hope it will be resolved soon so I will be able to link up my card to various challenges.

Thanks for stopping by!

Wednesday, April 2, 2014

Friends Forever

I think it has been a while since I said Hello to those that do not live close by.  How about sending them a friendship card?

I do not make many friendship cards but I like making them a lot because even though not all my friends are crafting they like my cards and they reply with a letter that tells me how they are.  That letter coming through the mail man means so much to me!


I love the Ivy Lane paper from Close to My Heart.  I like the color combo of green and purple.  Did you know that these colors are exclusive to the Ivy Lane paper?  They are so pretty.  I was at first a bit intimated by these special colors but everything I needed is in the workshop on the go, so there is really no need to look further.

This card is perfect to link up to the Color My Heart challenge:


It is also linking up to
Creative Card Crew - Animals
Cards in Envy - Anything Goes
Paper Nest Doll - Anything Goes
Deep Ocean Challenge - For a Friend
Just Inspirational Challenge - Family or Friends

Thanks for stopping by!

Saturday, February 15, 2014

Love you tons

Happy Belated Valentine's Day!  I didn't give out this card on time as I was too tired to finish it off after work yesterday.  Nevertheless I think its cuteness will make up for its tardiness.  I surely had tons of fun making it and I'd love to convert it to other types of cards.


It is a three dimensional card but you could fold it flat.  How nice!  I made the box with Kraft cardstock then added patterned paper to decorate it.  Then I cut many hearts from various patterned paper and stuck them to the anchoring bars in the middle of the box.  The picture above is a top-front view but if you look at it from the front the hearts appear that they are floating. 

One note that I want to make to myself is that the cute Love You Tons stamp set from Lawn Fawn can be used not just for Valentine's Day cards.  I think it will be a cute card to say "tons of happiness" for a birthday card. :)

My card is linking up to the following:
Artistic Inspiration - Anything Goes
Bunny Zoe - Love
Eureka - Love is in the air
Kaboodle Doodle - To my sweetheart
Card Mania Challenge - Love is All Around
Papertake Weekly - With a Heart
Paper Minutes - Love is in the air
Paper Crafting Journey - Love is in the air
Jo's Scrap Shack - Happy Valentine's Day
Polkadoodles - Love/Romance


Thanks for stopping by!

Sunday, January 5, 2014

Love you

When a cold knocks at my door I tend to stay in but it is killing me that my big headache and runny nose keeps me from crafting.  I spent most of my time in bed watching TV and DVDs this weekend but nonetheless made a Valentine's Day card:


I had bought the patterned paper before I took off for my family gathering but this is the first time I use it.  The two hearts were cut with Cricut Art Philosophy cartridge at 1.5" while "love" is an independent die from Memory Box.  It is part of the peace, joy, love collection and I think "love" is perfect for a V-day project.  The "you" is part of another Memory Box die "thanks you".  I love that die for thank you cards - you could snip off the "s" to make "Thank you" or keep it for "thanks".  Now that I use just the "you" part for my sentiment, it is similar to masking off your stamps to create a new image.  Who doesn't like to have more mileage of the craft supplies?

I must give credit to the sketch at Atlantic Heart Sketches - it is a sketch that provides lots of opportunities!


My card is linking up to the following challenges:
Atlantic Heart Sketches - see sketch above
Polkadoodles Challenge - Anything Goes
Simply Create Too - Anything Goes

Thanks for stopping by!

Sunday, December 15, 2013

A Last Minute Christmas card

We are down to just 10 days before Christmas.  Are you ready?  I am still making some last minute Christmas cards and buying presents and so forth. 

I'm sharing one of my last minute Christmas cards today.  It is based on the sketch from Atlantic Hearts Sketch Challenge:

I've used the Frosted paper to create this card:


I really love the soft colors and the snowflake patterns on this paper.  It seems that I can never have enough fun with it!

My card is linking up to the following challenges:
Atlantic Hearts Sketch Challenge
The Stampin Chef - Anything Goes
Jo's Scrap Wrap - Winter
Sister Act Challenge - Anything Goes
Creative Fingers - Anything Goes
Polkadoodle - Anything Goes

Thanks for stopping by!

Thursday, December 5, 2013

My craft area

Boy I miss my craft area!

I had some major re-organization in my craft area last weekend.  I bought some new storage units, assembled them and started to organize my stash.  I was very excited with one of the units because it fits Close to my Heart stamp sets perfectly.  I have been looking for the right unit and have been trying different ones.  The one I used previously was nice but I was sad to realize that the model was discontinued so I could not buy it anymore.  While my collection continues to grow, I really need something new to accommodate all my stamps.  I was over the moon to have found this new unit that works so nice.  I also got some new units for papers and now everything is contained and my craft area looks so much nicer.  I've also organized the living room to put up a small Christmas tree.

Perhaps I've invested energy too much in organization, I have been coughing non-stop since then.  Had I known that this cough was coming I would have let go of organization and crafted.  Had I known that....

Nevertheless I was finally able to get out of bed and played for a short while.  I've used this sketch from Seize the Sketch to make a Christmas card:


At first I wanted to use a different stamp set but after changing my mind for about a million times, I think I like this one:


My card is linking up to the following challenges:
Seize the Sketch
Hiding in My Craft Room - Anything Goes
613 Avenue Create - Anything Goes
Challenges 4 everybody - Anything Goes
Come and Get it Challenge - Christmas
My Besties Norge - Christmas

Thank you for stopping by!

Sunday, November 24, 2013

Her Christmas card

If you want to see the masculine version of this card, please scroll down to the next post.

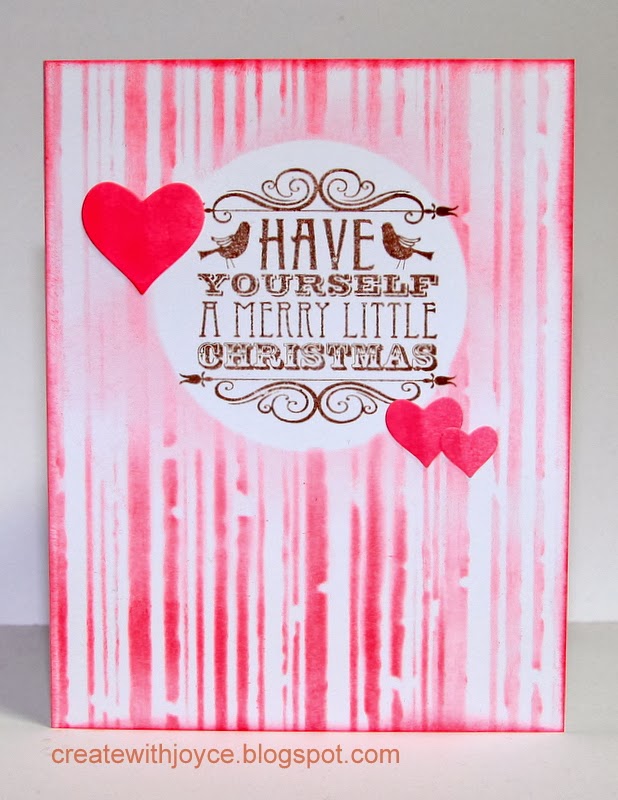
This feminine version of Christmas card uses Tim Holtz stripes stencil and distress inks to create the background.  The hearts were colored with distress stains on plain old white cardstocks as I didn't have the matching red cardstock.  Don't you love this trick to create your own while keeping your stash at a minimum?

I thought that while the guy version has stars as embellishments, I'd use hearts for this feminine one.  It turns out cute. 


If you are interested in knowing, I like this feminine version better.  However, I presented these two cards to a guy and he likes the masculine version better.  Go figure.

I do not like the masculine version as much because the greens were not dark enough.  If I were to make them again, I would have used forest moss or pine needles, some darker shades than shabby shutters. 

Remember to scroll down to the next post for the masculine version of it.

Thanks for stopping by!

His Christmas card

I can't tell you how fast time is flying these days.  This year it seems that I have a lot more to do than last year.  Last year this time I had all my Christmas cards done but now, I'm still preparing them.  The fast-approaching Thanksgiving certainly gives me some pressure, then my yearly family trip gives me extra burden, let's not forget about buying gifts for everybody.......

With all these tasks on my list, I've decided to take it easy and slowly.  I am sure no one is going to kill me if I send a Thanksgiving email instead of a handmade Thanksgiving card.  If I really can't find the perfect gift, a gift card should do.  All I want is to enjoy the holiday season with family and friends.  I feel that my struggle for the perfect holiday season weakens the holiday spirits. 

Just want to remind myself and you the same - enjoy the holiday season, don't let the list of tasks kills you.

Onto His Christmas card, I never really thought that Christmas cards have a gender, until I learn those tricks from a workshop.  I decided to make a his version and a her version of a Christmas card.  This is the his version:


I have used the Tim Holtz Stripes stencil to create the background.  In order to make the stamping area more pop, I had sponged it harder before I peeled off the mask.  Then I realized that I did not have the green paper for stars, so I used distress stain to swipe across white cardstock to create my own colored cardstock.  After sticking the die cut stars and sponging the edges, the card is done.

See its sister twin by scrolling up!

Thanks for stopping by!

Wednesday, November 20, 2013

One stamp two ways Part II

Thanks for joining me in seeing this second card made with the same Lawn Fawn stamp set.  When I first bought it, I already thought that it would make a cute Anniversary card.  I still think it does, except that I need the sentiment to go with it.  As I have a stamp that says "congrats" I think it could turn into a wedding card.  Check this out:


The two birdies scream "smooch" to me.  With a little heart between them, don't you think they have word bubbles above them that say "I love you" to each other?

To me, it feels really great that I've found an unconventional way to use this Christmas stamp.  Who doesn't want to stretch the products we already have?

My card is linking up to the following challenges:
Less is More - Designer Paper CAS way
Corrosive Challenge - Fur/feathers
Through the Craft Room Door - Anything Goes
Lady Anne Challenges - more than one layer
Make it Monday - Anything Goes

Thanks for stopping by!

Tuesday, November 12, 2013

Window card

I am still obsessed with window cards and I am happy to share one with you today. 

While I was determined to make a Christmas card with a window, I thought I'd like to keep most other things simple.  The window should be the star of the card!  I saw the love snowflakes from the muse at Muse challenge, then I was inspired to stamp snowflakes on my window card.  In particular, I knew I was going to use a couple of snowflake stamps.  The Muse used a couple of colors for the snowflakes but I opted to use one color, again I want to create this background of snowflakes for the stunning window. 

Since the snowflakes are in light gray (Whisper), I'd love to create something bold for the window:

And as if the big sentiment isn't enough to draw your attention, I've added washi tape on both the top and bottom of it, with a bigger red circle as a mat.  This picture shows the interior better:


I can't tell you how happy I am with the results of this experiment.  I really like to turn this postal-friendly flat card so interesting for the recipient!

My card is also entering the following challenges:
Avenue 613 - Anything Goes
Challenges for everybody - Anything Goes
That Craft Place - Sentiment
Cards in Envy - Say What?
Artistic Inspiration - Use a Sentiment

Thanks for stopping by!

Monday, November 11, 2013

Having fun with Washi tape

The washi tapes that I have were not very popular until recently.  I thought they were just tapes and didn't bother to do much with them.

But as I was thinking about cutting some baubles out from my Cricut Art Philosophy cartridge, I had an idea and experimented it.  It worked pretty well:


I first taped the washi tapes on a piece of cardstock.  Since the patterns of the washi tape can form a continuous pattern, I did my best to line them up perfectly.  When the ornaments were cut out, it looks as if they were cut out from a piece of patterned paper.  So cute!  The big round ornament was covered with the silver washi tape from Holidays from the Heart Guide but I'm afraid the picture does not do it justice. 

I threaded the linen through and tied a bow, stamped a sentiment, added a piece of the glitter tape, put it on the Juniper cardstock background, and finally the patterned paper was cut with my new favorite - the scallop border punch, the card is done!

My card is entering the following challenges:
Sweet Stampin' - Christmas is coming
2 Sisters Challenge blog - Christmas sparkle
Great Impressions - Holiday card or tag
Amusing Challenge - Glitter
Addicted to Stamps Challenge - Favorite punches & dies

Thanks for stopping by!

Sunday, November 10, 2013

One stamp two ways

I love to explore more ways to use the same stamp.  A couple days ago I used the big sentiment stamp on a one layer card.  Today I'm sharing another card that uses the same two stamps:


This time the sentiment was stamped in Ruby and the panel was matted in Ruby cardstock.  The similar thing is that I used the same small background snowflake stamp as the background.  Because I inked it in Whisper and stamped the second generation image, it is really really light.  I like this subtle background as it echoes the polka dots background. 

For the snowflakes I could not have thanked the Cricut Art Philosophy cartridge enough.  It helped me cut 10 snowflakes (P.27 of the handbook) at 3 sizes: 1", 3/4" and 1/2".   If you are thinking where I got the coordinating snowflake stamps, look at the same stamp set from Frosted cardmaking Workshop on the Go.  There are three snowflake stamps in the set.  I didn't use the largest one, as it is really large, but I made use of the other two.  These snowflakes do not fit perfectly with the snowflake die cut, but it will work just fine because it is a symmetrical hexagonal shape.  I can't really explain the geometry here, but try it out and you'll see why.

I added some Glitz glitter gel (silver) to the tips and center of each snowflakes and the snowflakes are all sparkling!  Love it!
My card is based on the sketch from Atlantic Hearts Sketch Challenge:


It is also entering the following challenges:
Sister Act Card Challenge - Anything Goes
Craftitude - Anything Goes
Crazy 4 Challenges - Let's Frame It
Crafty Calendar - All Things Christmas
My Besties - Snowflakes or Glitter

Thanks for stopping by!